GLUTEN-FREE PISTACHIO COOKIES

Posted on
GLUTEN-FREE PISTACHIO COOKIES

Although I do not have celiac disease, I know several people who do. Once you know what to avoid, it’s fairly easy to cook for someone who has to avoid gluten, but finding desserts is another story. Fruit, ice cream, cornstarch puddings – those are easy enough, but baking is more complicated.

I found this recipe in the New York Times. These are simple to make and quite delicious, intense with cardamom and fairly sweet. They go very well with a cup of tea.

A couple of notes: Shelled pistachios cost about $13.00 and up; unshelled are about half that. It took me about 20 minutes and two fingernails to shell enough for this recipe, but it was worth it. If you buy pistachios in the shell, be advised it will take more than you think it will to make 1 cup + enough to put on top.

I made superfine almond flour by blitzing regular almond flour in the food processor. The pistachios were easy to grind to a powder in the food processor too, using the pulse function. They can easily turn to a paste, though, so don’t overdo it.

The dough can be made ahead and stored, covered, in the refrigerator for 2 or 3 days.

PISTACHIO COOKIES

  • 1-1/3 cups shelled pistachios, divided
  • 1-1/3 cups superfine almond flour (see note above)
  • 2/3 cup granulated sugar
  • 2 teaspoons powdered cardamom (or more)
  • big pinch salt
  • 2 large egg whites
  • 1/2 teaspoon pure almond extract or pure vanilla extract or pure orange extract
  • Powdered sugar (confectioner’s) as needed

Preheat oven to 350. Line cookie sheet with parchment paper.

In a food processor or blender, grind 1 cup of the pistachios to a powder (a little crunchy is okay). Combine in a bowl with almond flour, sugar, cardamom, and salt.

In a separate small bowl, whisk the egg whites until foamy, then add the almond extract.

Pour the egg whites into the dry ingredients. With your hands, mix them together to make a damp and very sticky dough. Roll tablespoon-size portions of the dough into balls, roll those in the powdered sugar, and place on the parchment-covered cookie sheet. Press a pistachio into each cookie.

Bake at 350 about 15 minutes until very lightly browned. Do not overbake. Remove cookies to a rack to let cool. Makes about 30. Store tightly covered.
A WHOLE-WHEAT BREAD FOR ST. PATRICK’S DAY

Posted on
A WHOLE-WHEAT BREAD FOR ST. PATRICK’S DAY

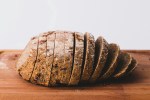
Here is a very Irish bread, developed by Myrtle Allen of Dublin. James Beard included it in Beard on Bread, an excellent book for beginning or experienced bakers alike. The recipe was recently featured in the New York Times cooking section. This is ridiculously easy to make. It’s quite unlike American breads – this is very dense, not at all sweet, and is 100% whole wheat. Slice it thinly and spread with butter and jam.

WHOLE WHEAT BREAD

  • 4 cups stoneground whole wheat flour (King Arthur makes a good one)
  • 1 teaspoon salt
  • 1 packet dry yeast
  • 1 tablespoon molasses

Preheat oven to 450 degrees.

Oil a bread loaf pan, about 8″ X 4″, then line pan with parchment paper, allowing the paper to overhang the sides.

Add the molasses to 1/2 cup warm water (110 to 115 degrees) and stir in the packet of yeast. Set aside until it becomes frothy. If it doesn’t bubble and froth, toss it and try again.

Mix the flour and salt in a medium-ish bowl, then add the now-frothing molasses-yeast mixture plus another 1-1/2 cups warm water to the flour. Mix with your hands until there are no flour pockets. You will have a sticky, gummy mass. This is fine.

Scrape the sticky gummy mass into the parchment-paper lined loaf pan and smooth the top with a knife. Cover with a towel and place in a warmish-but-not-hot place until the mass rises nearly to the top of the loaf pan. This could take anywhere from 20 minutes to 45 minutes (the flour I used had been in the freezer so it took longer).

. When the dough has risen nearly to the top of the loaf pan, remove the towel and place the pan in the oven on the center rack. After 20 minutes, lower the heat to 400 degrees. Bake another 20 to 30 minutes, until the loaf sounds hollow when rapped with your knuckles. If in doubt, test with an instant-read thermometer – it should read 190 degrees.

Remove loaf from the oven, tumble the bread out of the pan and tear off the parchment paper (it may want to stick). Let cool on a rack for 10 minutes before slicing.

ASIAN-FLAVORED PORK SHOULDER

Posted on
ASIAN-FLAVORED PORK SHOULDER

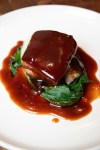
I didn’t actually know this would work as well as it did, but I figured it was worth a shot. The pork shoulder turned out juicy, pull-apart tender, and flavored inside and out.

I don’t know if this actually meets the definition of “lacquered” but that’s what I’m calling it.

LACQUERED PORK SHOULDER

  • pork shoulder, about 3 to 3 1/2 pounds, rolled and tied
  • 1/3 cup low-sodium soy sauce or tamari
  • 2 tablespoons hoisin sauce
  • 1 tablespoon oyster sauce
  • 2 tablespoons brown sugar, demarara sugar, or turbinado sugar
  • 1 or 2 star anise
  • 1 or 2 small dried hot chili peppers
  • 1 cup water plus more as needed
  • apple juice as needed (optional but tasty)
  • cilantro, green onions, toasted sesame seeds (garnish, optional)

Line a baking pan with heavy-duty foil, including the sides. You’ll regret it if you don’t.

Put the pork shoulder in the lined pan. Stab it all over with a small, sharp knife. Combine soy sauce, hoisin, oyster sauce, sugar, star anise, chilis, and 1 cup water. If the sugar stays grainy, heat the mixture and stir until it dissolves. Pour the liquid over the pork and turn the pork several times to completely coat it and get the liquid into those stab marks.

Roast the pork at 350 degrees. Every 20 minutes or so, turn the roast so all sides get exposed to the heat evenly. The liquid will evaporate and thicken so add more water and/or some apple juice as needed. Some of the liquid will heavily caramelize (this is where that foil lining comes in handy). Continue to roast until a thermometer reads 195 to 205, about 3 to 3 1/2 hours. It will turn a lovely mahogany color.

(While pork is considered done and safe to eat at 145, tough cuts like shoulder need to continue cooking to become fall-apart tender.)

Remove pork from baking pan, wrap with foil, and let sit about 20 minutes. Pour remaining liquid out of pan into a small bowl. It will have a lot of fat which is easy to skim off (or leave it, depending on how you feel about hot liquid pork fat).

To serve, cut the strings and slice/pull apart on platter. Garnish with chopped green onions, cilantro, and toasted sesame seeds. Serve with the reserved liquid, steamed rice, greens like sauteed broccoli, asparagus, cabbage, or bok choy, and cucumbers in a rice vinegar dressing. You could also serve it with lettuce leaves, chopped peanuts or water chestnuts, chopped green onions and cilantro, and some sauces like Sambal Oelek, hot mustard/wasabi, and hoisin to make wraps.

Photo by Amanda Lim on Unsplash

KEY LIME PIE

KEY LIME PIE

Long ago I used to make Nora Ephron’s key lime pie, the one she hit Carl Bernstein with. I liked it and so did everyone who tasted it, but its main downside was that it had to be frozen. It melted very fast when out of the freezer, so its practicality was limited. It does make a great summer dessert but we are here now in almost-winter.

To be honest, this is not Key Lime Pie because there is not one drop of Key Lime juice in it, just supermarket Persian limes, but let us not quibble. I found this recipe in the New York Times food section and the comments were full of quibbles, primarily over whether bottled lime juice was a good substitute for fresh-squeezed but when you’re spoiling for a fight, no detail is too minor to fight about. There were purists insisting on using only key limes (if you happen to have key limes and feel like squeezing a bunch of them, have at it) and others insisting on making a meringue with the leftover egg whites (feel free to do this, though I prefer a topping of whipped cream) and on and on.

For the record, I am squarely on the side of fresh-squeezed limes.

This can be made gluten free if you use gluten-free graham crackers.

This is extremely easy and very delicious and will prevent scurvy.

KEY LIME PIE

Graham cracker crust

  • 1/3 of a box of graham crackers
  • 6 tablespoons melted butter

Preheat oven to 325 degrees.

Crush the graham crackers. This can be done by placing them in a sturdy plastic bag and whacking the hell out of them with a rolling pin, or by feeding them into a blender or food processor. I like the rolling pin method because it crushes them into tiny pebble-like bits so there’s some texture and not just powder. Should have about 2-1/2 cups crushed crackers. However you do it, mix the bashed crackers with the butter and press into a 9″ pie pan. Note: this does not make a deep-dish pie so no need to press the crackers all the way up the edges of the pan.

Bake crust at 325 for 15 minutes. Set aside and let cool completely.

Filling:

  • 1 can sweetened condensed milk
  • 3 egg yolks
  • 1/2 cup lime juice, about 6 limes
  • 1 tablespoon lime zest

When ready to bake pie:

Combine milk with egg yolks and lime zest. Whisk in lime juice until smooth. Do not make filling more than five minutes ahead since the lime juice could curdle the milk.

Pour immediately into pre-baked and cooled crust. Bake at 325 for 15 to 20 minutes until filling is set.

Cool on a rack for one hour, then cover and refrigerate. Or if it’s winter and you have a cold garage, put it in there to finish cooling.

SOUP FOR SUPPER

SOUP FOR SUPPER
Photo by Monika Borys on Unsplash

Here on the North Coast of California, it’s gotten chilly, windy, and rainy of late. Though it’s never too warm here for soup, it’s seemed especially appropriate this last week. Here are two soups I made.

The first is a simple version of Scotch Broth. I used shoulder chops but lamb shanks would be an excellent substitute.

Barley is the traditional grain to use in Scotch Broth. Barley contains gluten, but this could be made gluten-free by skipping it and separately cooking another gluten-free grain, and adding some to each serving.

SCOTH BROTH

  • two lamb shoulder chops OR two lamb shanks
  • 2 leeks or 2 yellow onions, chopped (use the white part only of leeks)
  • 1 – 2 carrots, peeled and diced
  • 1 turnip/rutabaga/Swede about tennis ball size, peeled and chopped small OR two stalks celery, sliced thinly
  • 1/2 cup pearl barley
  • 6 cups water OR chicken broth
  • salt and pepper

In a frying pan, heat a little oil. Add the leeks and cook & stir over medium heat until slightly browned. Remove them to a slow cooker. Add the carrot to the same pan and again, saute/stir until slightly cooked. Remove carrot to slow cooker. Repeat with the turnip or celery. Add the chops or shanks to the same pan and brown them on all sides, then transfer them to the slow cooker. Deglaze the pan with a little water and pour that into the slow cooker.

Add the water or broth and the barley to the slow cooker. Cover and cook on high for two hours, then lower the heat and cook another 4 hours. Remove the chops or shanks and let cool. When cool enough to handle, remove the meat and chop it into small pieces, and return to the slow cooker. Season the broth with salt and pepper and let simmer another hour.

This is good when freshly made but better the next day. Refrigerate it so the fat can easily be removed.

~~~~~~~~~~~~~~~~~~~~~~~~~~~~~~~~~~~~~~~~~~~~~~~~~~~~~~~~~~~~

The second soup is adapted from a recipe by Anna Thomas. It looks complicated because there are three things cooking at once but each step can be done at your leisure, and all combined when ready. This is vegan and gluten-free.

I used a honey nut squash but there are a zillion varieties of winter squash out there, so use what looks and sounds good.

WINTER SQUASH AND TOMATILLO SOUP

  • 12 fat tomatillos
  • 4 tomatoes (Roma tomatoes are good for this)
  • 1 head garlic
  • 2 yellow onions
  • 1 smallish winter squash, about 2 pounds
  • 4 cups vegetable broth (or chicken broth)
  • 2 cups water
  • 1 or 2 small dried chilies OR hot pepper flakes
  • 1 bunch cilantro

Peel the squash, cut into halves and discard seeds. Cut the squash into pieces about 1/2″. Heat the vegetable broth and water in a soup pot, add the squash, and bring to a boil. Lower heat and cook until squash is very tender. Turn off heat and set aside.

Remove & discard the husks from the tomatillos. Cut them in half. Cut the tomatoes into quarters. Separate the garlic cloves but do not peel them. Put all on a rimmed baking sheet, sprinkle lightly with salt, and put in a 450 degree oven until vegetables are soft and starting to get tiny char marks, maybe 35 to 45 minutes. Remove pan from oven and let cool. When cool enough to handle, scrape the tomatoes from their skins. Put the tomatillos and tomatoes into a blender jar and squeeze the soft roasted garlic in too. Add any juices from the baking sheet, add a little water, and puree. (This can also be done in a food processor or with a stick blender.) Set aside.

Peel, quarter, and slice the onions. Heat a little olive oil in a wide frying pan and add the onions with a pinch of salt. Saute them over medium-high heat, stirring frequently, until they caramelize and turn deep golden. As they cook, scrape the bottom of the pan to bring up any browned bits.

When ready to assemble soup:

Add the pureed roasted vegetables to the squash & broth. Scrape the caramelized onions in too. Add a little water to the onion frying pan, scrape up all the browned bits and pour that in. Season with salt and pepper. Chop one dried chili and add to the pot, two if you have good heat tolerance. Chop cilantro and add as much as seems prudent.

Like most soups, this is good freshly made but even better the second day.

COCONUT RICE

COCONUT RICE
Photo by Kalyani Akella on Unsplash

I was making fish sticks (not my idea) for dinner and needed something to go with. I had green salad and wanted something starchy. Plain rice didn’t seem like enough. I was thinking lemon rice but came across the coconut rice idea instead. It worked very well.

Coconut milk comes in regular and low fat. The low fat doesn’t have much taste so I recommend the regular.

This makes a lot but leftovers keep a few days in the refrigerator, or can be frozen successfully.

COCONUT RICE

  • 2 cups jasmine rice
  • 1 can coconut milk (about 12 ounces)
  • 1-1/2 cups water
  • 1/2 teaspoon salt
  • 1 to 4 teaspoons sugar
  • 1/2 cup unsweetened grated coconut
  • 1/2 cup almonds
  • 1/4 cup chopped cilantro (optional)

Put the rice in a sieve and rinse thoroughly until the water is clear. (This ensures dry separate grains – not rinsing will make the rice sticky.) Put rice in a saucepan that has a tight-fitting lid. Add the coconut milk, water, salt, and sugar, and stir. Bring to a boil, cover, and turn the heat down as low as possible. If the lowest heat seems to be too hot, turn the burner off and keep rice tightly covered.

Taste after 10 minutes. It might be as done as you like. If not, replace the lid and continue to cook. When rice is done, remove the lid and continue to cook another 5 minutes (watch carefully to be sure it doesn’t scorch).

While rice is cooking, put the coconut in a dry frying pan over medium heat and cook, stirring very often, until toasted. It can burn very fast so watch carefully. When it’s lightly browned remove coconut to a plate, then add the almonds to the pan and toast them also. When almonds smell nutty and are very lightly browned, turn them out onto a cutting board. When they’ve cooled, chop them into small bits.

When ready to serve, sprinkle the coconut, almonds, and cilantro over the top. Besides being a simple side dish, this is good with curry, chicken with gravy, any spicy saucy dish, lamb or pork dish, fish, or meatballs in tomato sauce.

Variations: if you hate cilantro, leave it out. Add any dried fruit (rinsed and chopped if large), or chopped green onions, or both. Try adding some cardamom seeds or star anise or a cinnamon stick to the pot and let them cook with the rice. Or try some hot pepper flakes.

This smells much like rice pudding and the sweetness seems to intensify after a day or two. It could be added to a mixture of eggs, milk, and vanilla, and baked until set for rice pudding. Or try adding a spoonful or two of coconut rice to hot chicken broth for a great variation on chicken soup.

Gluten-free Chocolate Chip Cookies

Gluten-free Chocolate Chip Cookies
Image by Dor Farber on Unsplash

I don’t really like chocolate chip cookies. I used to, and then… I dunno, my tastes changed or something. I consider them mediocre. However, many sources say they are the most popular cookie in America followed by peanut butter cookies, which I don’t much like either. So if you’re looking for an authority on what people like to eat, don’t ask me.

But I had occasion this weekend to make some gluten-free cookies for someone with celiac, and not knowing a lot about gluten-free baking I did what anyone would do, and turned to Google. That’s where I found this recipe from the New York Times. It got all 5-star reviews and I had the almond flour it called for. The only thing I didn’t have were chocolate chips, and it was easy to find gluten-free chocolate chips in the supermarket (Nestle brand; there are probably others).

The original recipe instructs you to make 10 enormous cookies, which didn’t appeal to me. Instead I scooped out what seemed to be the right amount of dough for an average-sized cookie, and baked them for less time. It also suggests flattening the cookies a little before baking and sprinkling with sea salt. Since I didn’t know how the intended recipient felt about that sort of finishing touch, I left them naked and unflattened.

The instructions assume ownership of a Kitchenaid-type mixer: “Using a mixer fitted with the paddle attachment.” I do not have such a beast because I don’t have any counter space for one. I do have a small handheld mixer, and that worked just fine.

I have had three tasters assure me these are every bit as good as conventional chocolate chip cookies, so I am taking their word for it.

GLUTEN-FREE CHOCOLATE CHIP COOKIES

  • 2 ¾ cups almond flour (Bob’s Red Mill makes a good one, or get it from a health food store)
  • ¾ teaspoon salt
  • ½ teaspoon baking soda
  • 10 tablespoons softened butter
  • ½ cup light brown sugar
  • ½ cup granulated sugar
  • 1 large egg
  • 1 ½ teaspoons pure vanilla extract
  • 10 ounces gluten free chocolate chips

Line two cookie sheets with parchment paper. Preheat oven to 350.

Whisk the almond flour, baking soda, and salt together and set aside.

In a separate bowl, cream the butter and both sugars with a mixer on medium about 4 minutes. (If you have a fancy Kitchenaid mixer, use the paddle and mix the same amount of time.) Add the egg and vanilla, and mix to combine. Scrape the sides of the bowl down.

Add the dry ingredients and mix on low, scraping the sides of the bowl, and then mix on low until all ingredients are incorporated.

Switch to a wooden spoon. Add the chocolate chips and mix in.

Scoop dough by heaping tablespoons onto the parchment-covered cookie sheets. Space about 1 1/2″ apart.

Bake about 12 to 14 minutes. Watch carefully toward the end of the baking time: you want them lightly browned but no more. Remove cookies to a cooling rack.

Makes about 2 1/2 dozen.

EGGPLANT PARMIGIANA

Posted on
EGGPLANT PARMIGIANA

I love eggplant Parmigiana but I hate making it. It feels like I have to make multiple dishes in order to get to the final dish, and then the leftovers are kind of stodgy and heavy and not really all that good.

And then mine eyes were opened in, of all places, Amsterdam. We had the Eggplant Parmigiana of our dreams. Truly.

Eggplant Parmigiana at De Blaffende Vis

Our favorite watering hole also makes excellent food. We’d planned to go elsewhere our first night there but we were really tired and De Blaffende Vis is around the corner from our apartment. There was a brief language keruffle – the daily chalkboard menu listed melanzane Parmigiana, which I translated to my husband, and he immediately told the Dutch waiter he’d have the eggplant.

:::Insert blank stare:::

The word eggplant means nothing in Dutch or actually, pretty much anywhere in the world except the US, so I re-translated back to Italian. (Not that I am a linguistics whiz; I just happened to know these words.)

What was set before us didn’t look like any eggplant Parmigiana I had ever seen. It looked like lasagna and the top almost seemed burned, but I dug in anyway. Holy God, was it good. Nothing crusty and breaded and deep-fried, just lovely creamy eggplant in a fabulous sauce with deeply browned cheese on top. We ate it in record time.

I spent time trying to figure out what they did and while I’ll never know for certain, I am pretty sure the eggplant slices were roasted, then layered in a baking dish with shingles of cheese on top, and baked in a very hot oven until the cheese deeply browned.

I made a couple of stabs at it once we got home. One element that can’t be replicated is the superb eggplant grown there; it’s creamy and nearly seedless. The Graffiti variety – mottled purple and white – is a good substitute if available. Their eggplant wasn’t peeled and it wasn’t tough, but I think American eggplant needs peeling.

I also don’t use a lot of Parmigiana – heresy, I know – and instead use whatever cheeses I have on hand. Currently that’s some Dutch Gouda and English cheddar. I have found that covering the top of the eggplant with thinly sliced cheese makes for better browning than shredded cheese.

The disadvantage of this method is that you need a lot of eggplant, since roasting collapses the slices and they shrink. I figure three large eggplants or four medium for an 8″ X 11′ pan.

EGGPLANT PARMIGIANA

  • 3 large or 4 medium eggplants
  • olive oil
  • marinara sauce
  • cheese of your choice

Preheat oven to 450 degrees.

Peel eggplants and slice about 1/2″ thick – no thinner, or they will shrink down to nothing while roasting.

Generously oil a cookie sheet with olive oil. Arrange eggplant slices in a single layer (crowding is fine) and bake about 12 to 15 minutes. Flip each slice. Add a little more olive oil. Bake another 5 to 7 minutes and remove from oven.

Pour a little marinara sauce in a baking dish about 8″ X 11″. Lay slices of eggplant in dish, top with a little marinara (don’t drown them), and sprinkle with some grated cheese (not a lot). Repeat layers until all eggplant is used. Top with marinara and then lay slices of cheese on top. Cover dish with foil.

At this point the dish can be refrigerated for a day. Remove from refrigerator two hours before proceeding.

Bake covered at 375 for about 40 minutes. Remove foil and turn the broiler on. Broil the dish, watching very carefully, until cheese is browned.

This will burn the roof of your mouth as is, so let it cool about 10 minutes before serving.

THE RECIPES FOLDER

Posted on
THE RECIPES FOLDER

As most people do, I have multiple folders in my email account to hold stuff I want to keep in one place but not clog up my regular email. One of those folders is Recipes. Usually what happens is my husband finds an online recipe and emails it to me, and I think it might be worthy of making someday. Or I ask someone how they made their salad dressing, and they email me, and into the folder it goes.

Yesterday I took a closer look. That Recipes folder goes back to 2009. It’s time to do a little housecleaning.

The braised eggplant with quinoa – that gets deleted. We’ve tried, God knows we tried, but neither of us really likes quinoa. A recipe from Epicurious for cinnamon rolls – Epicurious started charging a subscription fee so screw them, and anyway I already have a cinnamon roll recipe I like very much. A recipe for brownies – really dark rich chocolate doesn’t agree with my husband. Out it goes.

But there are a lot of other recipes that do look like keepers, so I’ll be moving them here. Here’s the first one. No idea where this came from.

Photo by yvonne lee harijanto on Unsplash

BBQ PORK SANDWICH

Dry rub:
2 tablespoons salt
2 tablespoons black pepper
2 tablespoons dark brown sugar
2 tablespoons paprika
1/2 tablespoon cayenne

4 pound shoulder pork roast
2 cups apple juice
1 cup apple cider vinegar
2 tablespoons Worcestershire
1/2 tablespoon garlic powder
6 soft hamburger buns

Mix the dry rub ingredients in small bowl. Sprinkle rub all over the pork roast, pressing into the pork. Cover with plastic and refrigerate overnight.

Combine liquid ingredients and the garlic powder in a medium bowl and pour into slow cooker. Cook on low for about 11 hours hours or high heat for about 5 hours.

Shred the pork with a fork or tongs into bite-size pieces.
Serve on hamburger buns topped with barbecue sauce.

ALMOND FLOUR PANCAKES

Posted on
ALMOND FLOUR PANCAKES
Photo by Jaqueline Pelzer on Unsplash

I had almond flour that needed to be used before it turned rancid. Decided to make pancakes with a “what’s the worst thing that could happen” attitude. As it turned out, they were wonderful.

ALMOND FLOUR PANCAKES

  • 1 1/2 cups almond flour
  • 3 cups pastry flour, white or whole wheat
  • 4 tablespoons granulated sugar
  • 2 tablespoons baking powder
  • 1 teaspoon baking soda
  • 1/2 teaspoon salt
  • 2 cups buttermilk or milk with 2 teaspoons vinegar added and allowed to stand 5 minutes
  • 1 egg
  • 1/4 cup oil such as canola
  • 2 teaspoons pure vanilla extract or almond extract

Place all dry ingredients in mixing bowl and use a whisk to combine. Be sure there are no lumps in the baking soda and baking powder and that they are fully incorporated into the other dry ingredients.

Beat egg with oil. Pour into dry ingredients along with buttermilk or soured milk and the vanilla. Stir, scraping from the bottom of the bowl, to mix the dry into the wet ingredients.

If mixture is too thick, add more milk, a little at a time, until batter is thinned as much as you like.

Allow batter to stand 10 minutes. At this point, batter can be refrigerated, covered, up to five days.

Turn oven to 350 for 2 minutes with an oven-safe plate in it, then turn oven off.

Bake pancakes on preheated, oiled griddle over medium heat. Pancakes will puff up. Flip when browned on one side. As they come off the griddle, layer them on the warmed plate in the oven.

Serve with fresh fruit, sour cream, cottage cheese, and syrup. Makes about 20 3″ pancakes.